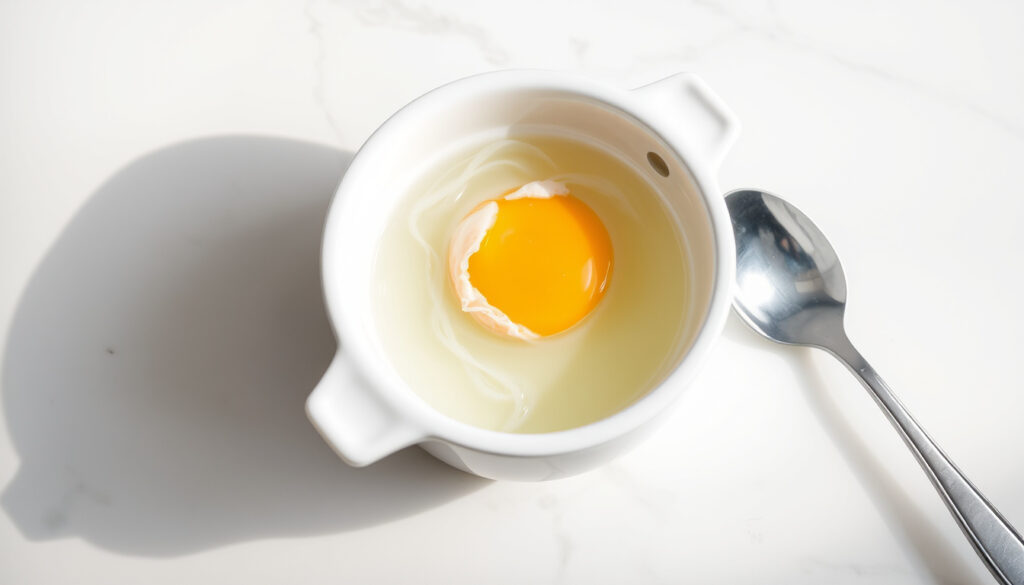
How to Poach Eggs Perfectly Every Time: Step-by-Step Guide
There’s something quietly satisfying about slipping an egg into simmering water and watching it transform. But getting that perfect poached egg—firm white wrapped around a runny yolk—is actually a simple system of temperature, freshness, and proven techniques that any home cook can master.
Average cooking time: 3–4 minutes ·
Ideal water temperature: 180–190°F (82–88°C) ·
Vinegar volume: 1 tsp per 2 cups water ·
Success rate with fresh eggs: Nearly 100%
Quick snapshot
- Water should be at a low simmer (180–190°F) — Men’s Health (culinary resource)
- Fresh eggs (under 1 week old) hold shape best — BBC Good Food (UK public broadcaster)
- Vinegar helps whites set faster — Jessica Gavin (food science site)
- Exact vinegar quantity — varies by taste and water volume across sources (Taste of Home (home-cooking authority))
- Maximum safe holding time for batch-poached eggs in ice water — not formally tested by food safety bodies (Taste of Home (home-cooking authority))
- Optimal water temperature exact range — varies from 160°F to 200°F across sources (Taste of Home (home-cooking authority) suggests 160–180°F, Culinary Ginger (recipe blog) suggests 200°F)
- Effectiveness of vinegar pre-soak vs. adding to water — no consensus on which works better (Taste of Home (home-cooking authority))
- 3 minutes for runny yolk, 4 minutes for medium, 5 minutes for firm — Taste of Home (home-cooking authority)
- Practice the strain-whirlpool combo for consistent results at home
- Restaurant-style batch prep: cook eggs, chill in ice water, reheat to order
Five key facts, one pattern: poaching success comes down to controlling three variables—egg freshness, water temperature, and handling technique. Here’s how they stack up.
| Factor | Recommended value | Source |
|---|---|---|
| Water temperature | 180–190°F (82–88°C), just below a simmer | Preppy Kitchen (cooking blog) |
| Cooking time | 3–5 minutes, depending on desired yolk firmness | Taste of Home (home-cooking authority) |
| Vinegar quantity | 1–2 tsp per 2 cups water (optional) | Jessica Gavin (food science site) |
| Egg age | Under 1 week old for tightest whites | BBC Good Food (UK public broadcaster) |
| Preferred method | Strain egg, gentle whirlpool, slide in | RecipeTin Eats (recipe site) |
What is the correct way to poach an egg?
Starting with fresh eggs
The single most important variable in poaching is egg age. Fresh eggs—ideally less than one week old—have thick, compact whites that hold together when they hit the water. Older eggs develop watery whites that spread out into wispy strands, creating that “egg drop soup” effect nobody wants. Men’s Health (culinary resource) notes that freshness is the foundation of a neat poached egg. To test freshness, place the egg in a bowl of water: a fresh egg sinks and lies flat; an older egg stands upright or floats.
Bringing water to the right temperature
Water temperature separates success from scrambled failure. Fill a large saucepan with about 3 inches of water and bring it to a gentle simmer—you want tiny bubbles forming at the bottom but not breaking the surface. The ideal range is 180–190°F (82–88°C), according to guidance from Preppy Kitchen (cooking resource). Some sources, like Taste of Home (home-cooking authority), suggest a slightly cooler range of 160–180°F, but the consensus among leading culinary publishers points to the 180–190°F sweet spot. A rolling boil is the enemy—it will tear the egg apart before it has a chance to set.
Cracking and sliding the egg in
Never crack an egg directly into the poaching water. Instead, crack it into a small bowl or ramekin first. This lets you check for shell fragments and gives you controlled entry. For the cleanest result, create a gentle whirlpool by stirring the water in one direction with a spoon, then slide the egg into the center of the vortex. RecipeTin Eats (recipe site) recommends starting the egg as soon as the water has settled to a low simmer with only tiny bubbles at the base.
Home cooks who use fresh eggs and a thermometer see dramatically fewer failures than those who guess by eye. The 180–190°F window is your insurance policy against both undercooked whites and water that’s too aggressive.
Do you need vinegar to poach an egg?
How vinegar helps the white set
Vinegar is the most debated ingredient in poaching. The science is straightforward: the acid in vinegar lowers the pH of the water, which causes egg proteins to coagulate (set) faster. This means the white firms up almost immediately, holding a compact shape rather than spreading out. Men’s Health recommends about ¼ cup vinegar per quart of water, noting that too much can make the white overly firm. Jessica Gavin (food science site) takes a lighter approach with 2 teaspoons per 4 cups of water. Most home cooks find 1 teaspoon per 2 cups to be a reliable middle ground.
Alternative methods without vinegar
“With very fresh eggs and careful temperature control, you can achieve perfect poached eggs without any vinegar.” — BBC Good Food test kitchen
Vinegar is optional, not compulsory. If you prefer to skip it—perhaps for taste reasons—the key is compensating with technique. Strain the egg through a fine-mesh slotted spoon first to remove the watery, loose white that tends to feather out. Then use a gentle whirlpool to wrap the remaining compact white around the yolk. BBC Good Food (trusted UK cooking resource) confirms that fresh eggs + careful temperature control can deliver perfect results without any acid.
Taste impact of vinegar
When used in small quantities (1 teaspoon per 2 cups of water), the vinegar flavor is imperceptible in the finished egg. However, some cooks report a subtle tang if they use larger amounts or soak the egg in a vinegar solution beforehand. Tasting Table (food publication) describes a pre-soak method using equal parts water and white vinegar with a 10-minute soak before poaching—this approach concentrates the acid’s effect on the white without affecting the yolk’s flavor profile.
No-vinegar poaching works beautifully with fresh eggs, but older eggs (1 week+) will struggle without acid assistance. If you’re using supermarket eggs that sit for days before sale, vinegar is your safety net.
Do you poach eggs in hot or cold water?
Temperature range for poaching
Hot water, not cold. Poaching requires water that’s hot enough to cook the egg white rapidly without being so hot that it creates turbulence. The consensus range across culinary publishers is 180–190°F (82–88°C)—hot enough to set protein in seconds, cool enough to avoid boiling. What’s Cooking America (cooking encyclopedia) recommends boiling the water first, then reducing it to a simmer before adding the egg.
Why cold water fails
Cold water allows the egg white to dissolve before coagulation begins. The proteins in egg white start to set at around 145°F (63°C). If you drop an egg into water below that temperature, the white disperses into the water gradually, creating a cloudy, stringy mess rather than a neat ovoid. There’s no recovery from cold-water failure—the white is already dispersed.
How to maintain consistent heat
Without a thermometer, look for steam and tiny bubbles clinging to the bottom of the pan—not bubbles breaking the surface. RecipeTin Eats (recipe site) describes this as “the water is ready when there are no bubbles breaking the surface but tiny bubbles remain at the bottom.” If you see rolling bubbles, remove the pan from heat briefly to let it settle. A clip-on candy thermometer is a cheap, reliable solution for consistent results.
The temperature drop when you add a cold egg can be 10–15°F. Counter this by keeping the heat under the pan at medium-low—you want the water to return to the 180–190°F range within 30 seconds, not 3 minutes.
The catch: heat management is as important as the starting temperature.
What are common mistakes when poaching eggs?
Using old eggs
As noted, egg freshness is decisive. Old eggs (2 weeks or older) have thin, watery whites that spread uncontrollably. Men’s Health explicitly states that fresh eggs hold a compact shape while older ones disperse. If your egg white immediately feathers into wispy strands, the culprit is almost certainly age.
Boiling water
A full rolling boil will tear the egg apart before it sets. What’s Cooking America (cooking encyclopedia) emphasizes that vigorous bubbling can break the egg white or yolk. The fix: boil the water first to eliminate guesswork, then reduce to a low simmer where only the bottom of the pan shows small bubbles.
Skipping the bowl transfer
Cracking directly into water risks shell fragments and uneven white distribution. A small bowl gives you control. BBC Good Food (trusted UK cooking resource) recommends cracking into a cup first, then gently sliding the egg into the water near the surface—not dropping it from height.
Overcooking
Leaving the egg beyond 4 minutes produces a firm yolk—fine if that’s your preference, but most poached egg lovers want a runny center. The timing chart below gives you precision.
| Doneness level | Cook time | Yolk texture |
|---|---|---|
| Very runny | 3 minutes | Warm liquid yolk |
| Medium | 4 minutes | Thick, jammy yolk |
| Firm | 5 minutes | Fully set yolk |
Taste of Home (home-cooking authority) cites 3–4 minutes for runny-yolk poached eggs, while The Spruce Eats (cooking resource) suggests 2–3 minutes after a vinegar pre-soak. The shorter time reflects the pre-soak’s head start on coagulation.
The difference between a perfect poached egg and a ruined one is often just 60 seconds. Set a timer the moment the egg enters the water—don’t rely on instinct.
The implication: precision in timing eliminates guesswork.
What are three tricks to making the best poached egg?
Trick #1: Strain the egg
“The key to a foolproof poached egg is to remove the thin, watery white before cooking.” — J. Kenji López-Alt (Serious Eats)
Before poaching, crack the egg into a fine-mesh slotted spoon or strainer to let the thin, watery portion of the white drain away. This leaves only the thick, compact white that will hold a neat shape. Serious Eats (food science publisher) popularized this technique as part of their foolproof method. The loose white that drains off is what creates the wispy strands in the water.
Trick #2: Use a whirlpool
A gentle stir creates a vortex that wraps the white around the yolk like a tidy blanket. RecipeTin Eats (recipe site) recommends this restaurant-style technique to help the egg white encase the yolk. The motion doesn’t need to be aggressive—a few circular stirs with a spoon is enough. Drop the egg into the center of the moving water.
Trick #3: Flip the egg for even cooking
After 2 minutes, gently flip the egg with a slotted spoon so the top of the white also sits in the hot water. This ensures both sides cook evenly, eliminating the problem of a raw white patch on top while the bottom is perfectly set. Jessica Gavin (food science site) recommends this technique to produce evenly cooked whites every time.
The strainer method wastes some egg white (about 10–15% of total volume). If you’re feeding a crowd where every gram counts, skip the strain and rely on a fresher egg and a tighter whirlpool instead.
The pattern: each trick addresses a specific failure mode.
How do restaurants get perfect poached eggs?
Batch poaching and holding in ice water
High-volume kitchens don’t poach to order. They cook a dozen or more eggs at once, then immediately transfer them to a bowl of ice water to stop the cooking process. The poached eggs can be held in the refrigerator for up to two days. To serve, they’re reheated in near-simmering water for 30–60 seconds. Serious Eats (food science publisher) describes this batch-prep method as standard practice in professional kitchens.
Using a fine-mesh sieve
Before poaching, restaurant cooks often pass the egg through a sieve to remove the thin, watery white. The loose white is discarded; only the firm, compact white that attaches to the yolk remains. This creates the clean, round shape you see on brunch plates. BBC Good Food (trusted UK cooking resource) confirms this step is common in professional kitchens.
Trimming with scissors
After poaching, chefs trim any ragged edges with kitchen shears to create a perfectly round egg. This step is purely cosmetic but explains why restaurant poached eggs look identical. RecipeTin Eats (recipe site) notes that trimming is the final touch for presentation-quality eggs.
The ice-water method eliminates the stress of timing multiple eggs for a brunch gathering. Cook them all at once, hold them cold, and reheat individually when each plate is ready. For more batch-cooking techniques, see our guide on Pork Belly in Air Fryer: Times, Temperatures & Crispy Tips.
The implication: restaurant consistency comes from process, not magic.
How to poach eggs perfectly every time
Step-by-step guide with timing chart
- Fill a large saucepan with 3 inches of water. Add 1 teaspoon vinegar per 2 cups of water (optional).
- Bring water to a boil, then reduce to a low simmer. Target 180–190°F if using a thermometer—look for tiny bubbles at the bottom of the pan.
- Crack 1 very fresh egg into a fine-mesh slotted spoon. Let the watery white drain for 10–15 seconds.
- Transfer the strained egg to a small ramekin or bowl.
- Create a gentle whirlpool by stirring the water in one direction.
- Slide the egg into the center of the moving water. Start a timer immediately.
- After 2 minutes, gently flip the egg with a slotted spoon for even cooking.
- Cook for total of 3–4 minutes (runny to medium yolk). Remove with slotted spoon.
- Drain briefly on a paper towel to absorb excess water. Serve immediately.
This method is adapted from techniques published by Serious Eats (food science publisher) and RecipeTin Eats (recipe site). For more on temperature control fundamentals, see How to Caramelise Onions.
Recipe variations: no-vinegar, microwave, egg poacher
No-vinegar method: Use the strainer technique aggressively—remove as much loose white as possible. Rely on very fresh eggs (2–3 days old) and a precise 180°F water temperature. BBC Good Food (trusted UK cooking resource) confirms this works with the right egg age.
Microwave method: Fill a microwave-safe bowl with ½ cup water and 1 teaspoon vinegar. Crack an egg into the water. Microwave on high for 60 seconds for runny yolk, 75 seconds for firmer. This is convenient but inconsistent—results vary by microwave wattage.
Egg poacher pan: A dedicated poacher pan with cups works by suspending the egg over simmering water. Taste of Home (home-cooking authority) recommends greasing the cups before adding the egg to prevent sticking. The steaming effect can produce a slightly different texture—less tender than water-poached whites.
Visual cues for doneness
The white should be fully set and opaque—no translucent areas remaining. The yolk, when pressed gently with the back of a spoon, should feel warm and give way with liquid resistance. If the yolk feels firm, it’s overcooked. If the white is still jiggly in places, give it another 30 seconds.
The consequence: precision trumps luck; the method works for anyone.
accio.com, appeasingafoodgeek.com, chefsnotes.com, spice.alibaba.com, youtube.com
Frequently asked questions
Can you poach eggs without vinegar?
Yes. Use the straining technique to remove loose white, rely on very fresh eggs, and maintain water at 180°F. BBC Good Food (trusted UK cooking resource) confirms that fresh eggs and careful temperature control eliminate the need for vinegar.
How do I keep poached eggs warm before serving?
Transfer poached eggs to a bowl of warm water (not hot) and hold for up to 10 minutes. For longer holding, use the restaurant method: plunge into ice water immediately after cooking, refrigerate, then reheat in simmering water for 30–60 seconds before serving.
Why do my poached eggs always spread out in the water?
Two likely causes: the eggs are old (over 1 week), creating thin whites that disperse, or the water is too hot (boiling), which tears the egg apart. Use fresh eggs and keep water at a gentle simmer.
How do I reheat a poached egg?
Submerge the egg in near-simmering water (not boiling) for 30–60 seconds. The yolk will warm through without overcooking. Do not microwave a poached egg—it will explode.
Can I poach eggs in a microwave?
Yes. Crack an egg into a microwave-safe bowl with ½ cup water and 1 teaspoon vinegar. Cook on high for 60 seconds for a runny yolk. Results vary by microwave wattage, so test with one egg first.
What is the best pan for poaching eggs?
A wide, shallow saucepan (8–10 inches diameter) works best—it gives the egg room to settle without touching the sides. Non-stick pans make cleanup easier but aren’t required.
How do you remove the white film from a poached egg?
Gently peel the thin, wispy strands away with your fingers or a knife after poaching. This loose white didn’t set properly—it’s the same material you’d remove by straining the egg before cooking.
Is it safe to eat runny yolks?
The USDA recommends cooking eggs until both white and yolk are firm to reduce salmonella risk. If consuming runny yolks, use pasteurized eggs or eggs from inspected, refrigerated suppliers. People with compromised immune systems should avoid undercooked eggs.
Poaching an egg is a test of patience more than skill. The difference between a wispy mess and a neat, tender oval is a set of small, repeatable choices: buy fresh eggs, keep water at 180–190°F, strain out the watery white, and don’t rush the timer. For the average cook, the trade-off is clear: spend 3 minutes learning the technique, or spend a lifetime untangling wispy egg strings from your poaching water. A thermometer and a slotted spoon cost under $20 combined. That’s a small investment for a skill that elevates everything from toast to salads to grain bowls.
More related posts
 How Many Planets in the Solar System – The Official Answer
 Hunting and Fishing North Shore: Hours, Location, Products
 Thai Beef Salad Recipe: Authentic Yum Nua in 25 Minutes
 Words Starting with Q – Complete English Vocabulary Guide
 Mortgage Rates Comparison NZ: Latest and Best Deals
 Single Foam Mattress NZ: The Best Prices & Reviews
 British Passport Rule Changes 2026: Dual Citizenship Guide
 Bali Holiday Packages NZ 2026: Best Deals, Flights & Tips